Showing posts with label fabric. Show all posts

Friday, June 3, 2011

Mini Wallet Tutorial

Yay! It's finally here! Do you guys have your sewing machines out and ready to roll?

Before we begin, let me just say I am sorry for how picture heavy this post is. I am, however, the type of person that learns by seeing, and nothing drives me crazy more than a tutorial with only 1 picture every 5 steps or so. I like to see pictures for every single step. So if that's you, you'll enjoy this. If that's not you, well then, I suppose I'm sorry. But not really.

Click on any image to make it bigger.
Outer Fabric - The fabric I like to use for this is from the Home Decor section at Joann Fabrics. It's 100% cotton, but it's a heavier weight and more durable than plain cotton.

Lining Fabric - I just use plain, thin cotton for this. Your wallet is going to be pretty bulky around the edges by the time you're done sewing it, so try to go as thin as possible to avoid adding any extra bulk you don't need.

OK, you ready? Let's go.

1. Cut your fabric into 8 pieces (4 from the outer and 4 from the lining) matching the measurements below.
2. Set aside the 7x5.5 pieces. Match up the rest of the pieces according to size. Lay them on top of each other right sides together.
3. Sew each section together along the longer (5.5 inch) edge using a 1/2 inch seam allowance. 
4. Open up each section and iron the seam allowance to one side, and then fold along the seam and iron again. Do this on all 3 sections.
5. Get your large, 7x5.5 inch piece of lining fabric and lay it out right side up.
6. Lay the 3 smaller sections you just finished sewing and ironing, right sides up, on top of the lining piece in order of height. Lay down the tallest first, then the second tallest, then the shortest. The finished edges should be on top, and the raw edges should all line up across the bottom.
 7. Lay the large (7x5.5) outer fabric on top of this stack right side down.
8. Pin the bottom half together. If you laid everything out right you should be pinning through 8 pieces of fabric, so it'll be trickier than usual to pin it. 
9. OPTIONAL: Before you pin the top half, cut small triangles from the top corners.This will give the front flap of your wallet a little more shape.
10. Finish pinning around the top. Leave at least a 2 inch gap on the right side. 
11. Sew all layers together, except for the marked gap, using a 1/2" seam allowance. 
 12. Snip a small amount off the bottom two corners. Be careful not to get too close to your seam.
13. Turn the entire wallet inside out through the 2 inch gap. I know this can be tricky, but just go slowly and try not to tug too much or you may burst your seams. Once it's turned inside out use your fingers to push out the corners and make it as flat as possible.
14. Iron the life out of it. 
15. Make sure the raw edges where your 2 inch gap is are tucked inside. If they are sticking out or are folded funny, straighten them out, tuck them inside, and iron to hold it in place. 
16. Put two pins just above the tallest pocket. These are your "don't sew past this point" guides.
17. Now the scary part! Top stitch around the top half of the wallet, stopping before you cross the pins. Technically speaking you could top-stitch all the way around the wallet, but chances are your machine can't sew through that many layers without busting into flames or something like that. 
Remember that when you top stitch you want to stay very close to the edge of the fabric. To keep myself in a (relatively) straight line, I try to line up the edge of the fabric with the side of the hole in the center of the presser foot. The main goal here is to be sure that you're sewing close enough to the edge to sew over the raw edges where your 2 inch hole still is. If you sew too far in, you won't get them and they'll pop out and fray. 

When you're done it should look like this:
18. Double check that the formerly open gap is now sewed securely shut. Give yourself a pat on the back if it is. If not, it's time to familiarize yourself with my good friend the seam ripper and do it again. (My first mini wallet got top stitched about 4 times before I was satisfied with it, so no worries if you don't get it the first time).


19. Fold down the front flap and iron it. 
20. Almost there! The last step is to attach your closure of choice. Follow the given instructions on the packaging of the item you bought to add it to the wallet. Check, double check, and triple check that everything is lined up correctly before committing to anything.
 21. Jump up and down with joy, because you're done!
So that's it! I know that's a lot of pictures and a lots of steps, but it's really easier than it looks. Like I said before, I'm the type that likes to be babied through projects like this, so it's my personal preference to have each step outlined and have a picture for everything. I hope it all made sense! If you have any questions or suggestions to make this better/easier, feel free to leave them in the comments and I'll try to get back to you. And of course, if you make a mini wallet, please show me! Post a picture on your blog and let me know about it, or send me a picture via email to violetreaction@live.com. Happy sewing!

Saturday, January 1, 2011

Leanna Needs Your Help

I'm having a bit of a creative block at the moment, and am enlisting the help of my followers to give me ideas. So put your thinking caps on and here we go!

First off, my sister gave my fabric for Christmas. That's fabulous, except I don't know what to make with said fabric. I thought that it would be easy for me to come up with something, but so far I've got nothing. The fabric:
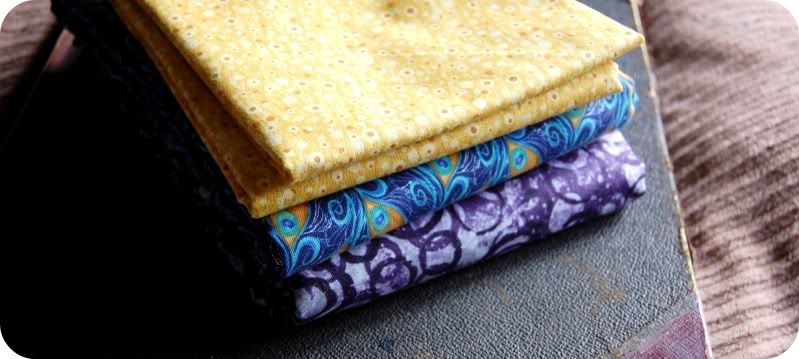
1 yard of blue peacock fabric, 1 yard of spotted yellow fabric, and 2 yards of purple ring fabric.

Close-ups:
What do you see these as? Obviously I wouldn't use all three in one project, but I do think using the first two together would work quite nicely. I know I'm going to use a part of the purple to make a pillowcase for my bed, but not all 2 yards so I need to think of something for that one, too. You aren't allowed to suggest clothing or anything hard like that, but I know how to make pillows, purses, wallets, and other generally easy project like that.

The second thing I'd love some ideas for are a whole bunch of impressionist painting prints that I cut out of a book. The book had been cluttering up my bookshelf for a long time, and I was just about to take it out to the garbage can when the silliness of what I was doing struck me. Prints as big as these usually cost $5+ in art shops, so it would be ridiculous of me to just throw out a book full of them. So out came my scissors, and out came the pictures.
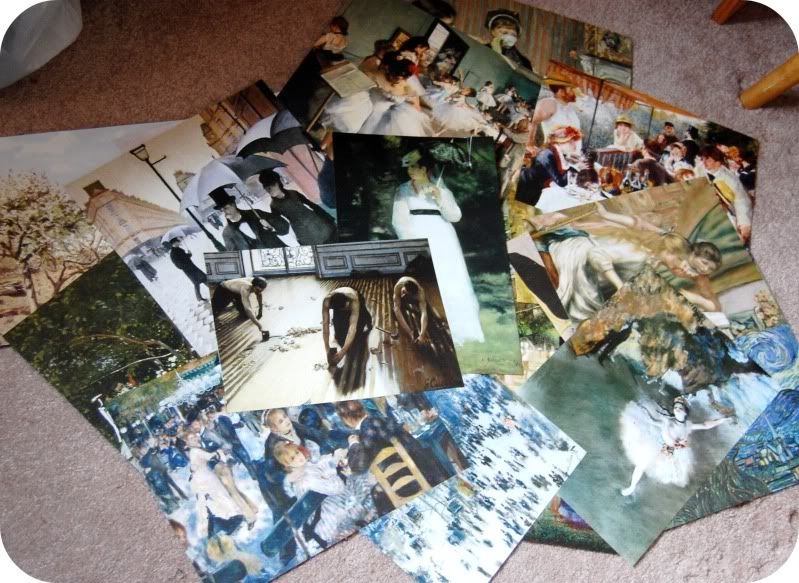
So now I have 22 painting prints that I don't know what to do with. Should I cover a whole wall with them? Should I cut them up and glue them onto books and things? Should I put them in a box and hide it under my bed? Should I burn them? I have no clue. Let me know what you think.
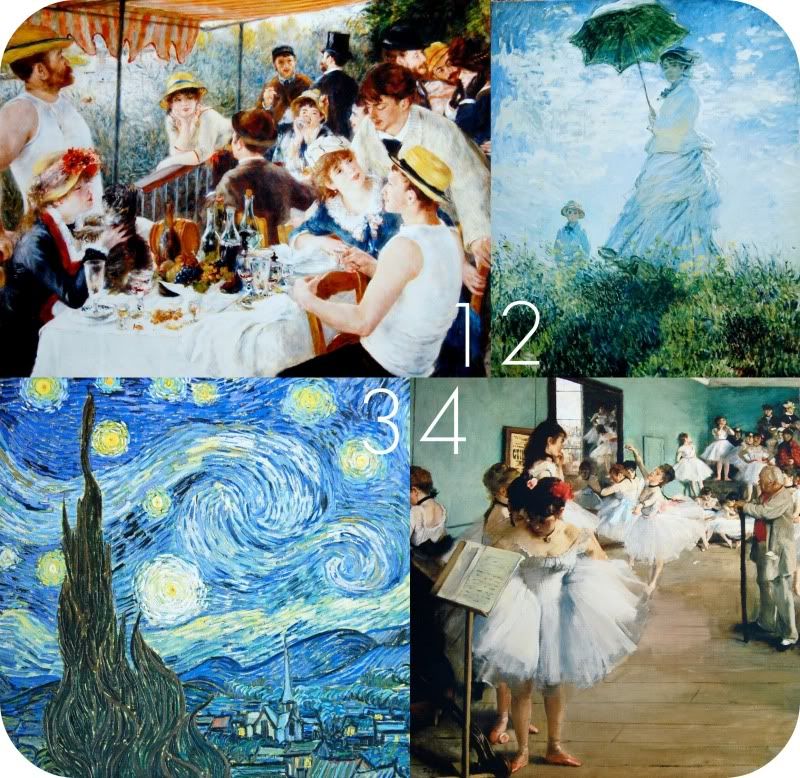
My four favorites:
1. Luncheon of the Boating Party by Pierre-Auguste Renoir. Those of you who have seen Amelie will recognize this one.
2. Woman with a Parasol by Claude Monet. I got to see this one at the National Gallery of Art in DC a few years back. Fun stuff.
3. The Starry Night by Vincent van Gogh. I got to see several van Gogh pieces when I went to the Musee d'Orsay in Paris this summer, though unfortunately not this one.
4. The Dancing Class by Edgar Degas. I did, however, get to see this one, and several others of Degas' dancers. Degas is my favorite impressionist, so it was quite a treat.

Let the ideas fly!